Table of Contents
ToggleRoute 66 is one of Overwatch’s most balanced and punishing escort maps, where positioning, team coordination, and knowledge of choke points separate the carries from the feeding players. Whether you’re climbing competitive ranks or refining your ranked grind, understanding Route 66 inside and out is non-negotiable. This isn’t a map where raw mechanics carry you through, it demands map sense, ultimate economy discipline, and the ability to adapt your team composition mid-match. We’ll walk you through every phase of this escort mission, from the opening gas station hold to the final truck stop showdown, covering defensive setups that actually work and aggressive payload pushes that break stale holds.
Key Takeaways
- Route 66 is a balanced escort map where team coordination, positioning discipline, and ultimate economy matter far more than raw mechanical skill.
- Attackers must stay grouped and move methodically through three distinct phases—gas station, downtown, and truck stop—using payload cover and coordinated ultimates to break defensive holds.
- Defenders win by stalling through evasion and time manipulation, rotating to pre-established secondary positions and forcing attackers to reset or burn resources rather than winning raw teamfights.
- Key Route 66 heroes like Reinhardt, Widowmaker, Lucio, and Tracer excel due to the map’s abundant sightlines and checkpoint spacing, but flexibility between map phases is critical for climbing.
- The most common errors—spreading your team, burning ultimates in already-won fights, and failing to capitalize on checkpoint momentum—directly translate to losses and can be eliminated through disciplined execution.
What Is Route 66 in Overwatch?
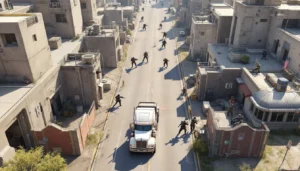
Route 66 is an escort payload map introduced in Overwatch’s original 2016 launch, and it remains a competitive staple across all ranks. The map follows a classic three-checkpoint structure where attackers push a payload (the truck) from the starting gas station, through downtown, and finally to the truck stop at the map’s end. The payload itself tells a narrative, it’s not just a game mechanic but a literal semi-truck that’s broken down and needs to be towed across the American Southwest.
What makes Route 66 distinct is its flow and pacing. Unlike some escort maps that feel cramped or artificially compressed, Route 66 offers multiple sightlines and flanking opportunities for both teams. The map rewards smart positioning over brainless aggression, and the checkpoint spacing forces natural teamfight breaks. In current competitive play (Season 12 as of early 2026), Route 66 sees consistent high-level engagement because the map’s design hasn’t fundamentally changed, though the meta heroes who dominate it certainly have.
Attackers win by moving the payload to the final checkpoint. Defenders win by either stopping the push before time runs out or preventing the payload from reaching subsequent checkpoints. The time bank system matters enormously here, if attackers are efficient in the first two phases, they bank crucial seconds for the final push.
Map Layout and Key Locations
Route 66’s geography is straightforward but deceptively layered. The entire map spans roughly 400 meters from start to finish, with three distinct regions that define the match rhythm.
The Starting Area: Route 66 Gas Station
The initial spawn and first checkpoint sits within and around a weathered gas station. The gas station building itself is multi-level with health packs (one small, one large) and provides vertical playing space. The left side of the gas station offers an elevated perch that snipers and ranged damage players exploit for opening picks. The right side is more open, favoring flankers and brawl-heavy comps.
The payload starts its journey just outside the gas station entrance. The open courtyard forces early teamfights, there’s minimal cover, making this phase susceptible to burst-heavy damage and aggressive initiations. Defenders often hold from the building’s roof or the elevated platforms, while attackers use their numbers to secure space. This checkpoint is often the fastest to clear at high levels because space control is relatively binary: either the defenders get high-ground value or they’re forced back.
Mid-Map Control: Downtown Route 66
After clearing the gas station, the payload moves through downtown Route 66, a series of interconnected street areas with buildings, shops, and street corners. This region is where positioning shines. There’s a church on the left, open street in the middle, and buildings on the right, creating a wide corridor with vertical and horizontal depth.
The downtown section has multiple small health packs scattered throughout, allowing defenders to sustain longer fights without backing to spawn. A critical defensive zone is the parking lot/church area on the left, it’s a natural choke that high-damage heroes can exploit to farm ultimate charge while picking off isolated enemies. The street right side offers flank routes and sightlines that help plays from Tracer, Sombra, or other mobility-based heroes.
This checkpoint typically extends match duration because the map opens up here. Teams that played too greedily in phase one may have burned ultimates and now face a momentum swing. This is where meta flexibility matters, a comp that excels in the tight gas station opener might struggle in downtown’s wider sightlines.
Final Checkpoint: Route 66 Truck Stop
The final push takes place at a truck stop area with a narrow approach and a final delivery zone. The architecture here is defender-favorable: buildings flank the approach, creating natural walls for defensive positioning. The attacking team must funnel through relatively tight spaces to reach the final capture point, giving defenders an advantage if they’re organized.
The truck stop has two primary defensive zones: the upper building overlooking the approach (offering high-ground sniper/hitscan value) and the structure directly blocking the payload path (ideal for tanky, front-line heroes). Time pressure becomes critical here, attackers know they’re running a clock, and defenders know a well-timed stall or pick can end the match. Ultimate economy often decides this phase entirely.
Optimal Attacking Strategies
Pushing payload on Route 66 requires more discipline than raw aggression. You’ll be playing through three distinct defensive positions, each demanding different approaches.
Payload Push Techniques and Positioning
The golden rule: stay grouped and move with purpose. Spreading your team across the map to farm picks is tempting but maps directly to throwing the round. Maintain a 5v5 or 4v1-setup where your team surrounds the payload and moves as a unit.
In the gas station phase, focus on securing the high-ground. Assign a player (usually an off-tank or ranged damage hero) to claim the elevated perch and hold it long enough for your team to burst down defenders. Once you own that space, the low-ground defenders are pinned and forced to reposition. Push methodically, don’t tunnel-vision on kills: focus on space denial.
In downtown, use the payload’s cover to your advantage. The payload provides mobile cover that shields your team. Rotate around buildings rather than taking straight paths. If defenders hold the church aggressively, use the left flank route to bypass them entirely. Coordinate ultimate usage: a tank ultimate like Reinhardt’s Earthshatter or D.Va’s Self-Destruct paired with a support ultimate creates irresistible momentum.
At the truck stop, patience wins. Defenders expect you to force the final meters out of desperation. Instead, bait their ultimates with coordinated poke damage, then commit to a full teamfight once ultimates are on cool-down. If time is low, then abandon subtlety and charge, but do it with everyone, not one hero at a time.
Team Composition and Hero Selection
Route 66’s meta shifts seasonally, but some principles remain constant. You need at least one high-damage, high-positioning hero who can create pressure, Widowmaker, Ashe, or Hanzo are classics here because they leverage the long sightlines. You need a tank who can move the payload forward and absorb chip damage, Reinhardt provides shields, Sigma offers positioning flexibility, and D.Va enables aggressive plays.
Support composition matters hugely. Pair a Lucio for speed and peel with a Mercy or Ana depending on whether you’re running a brawl or poke comp. Zenyatta works if your team farms ultimates quickly. Avoid greedy damage-heavy lineups that lack clear win conditions.
Common Route 66 attacking comps include:
- Reinhardt, Roadhog, Widowmaker, Ashe, Lucio, Mercy: Classic brawl-heavy setup with pokey damage upfront
- Sigma, Tracer, Genji, Widowmaker, Ana, Zenyatta: Mobile, ultimate-farm-focused lineup
- D.Va, Junker Queen, Soldier 76, Sojourn, Brigitte, Moira: High-sustained damage with close-range backup
Counterplay Against Defensive Holdouts
Some defending teams simply refuse to break. They consolidate on a choke and stack ultimates. Beating this requires patience and ultimate discipline. Don’t initiate fights you’ll lose, poke from safe distance, bait their defensive abilities (like Brigitte’s Shield Bash or Zenyatta’s Discord Orb), and only commit when the odds favor you.
Another tactic: use your tank to absorb initial burst and create space while backline heroes pick isolated defenders. A well-timed Reinhardt Shatter into Roadhog Hook combo dismantles even coordinated holds. If a single hero is hard-carrying the defense (e.g., a popping-off Widowmaker), focus your whole team on displacing or eliminating them, even if it costs ultimates. One dead carry beats a stalled teamfight.
Defensive Positioning and Holdout Tactics
Defense on Route 66 is about layered positioning and denying attackers space incrementally. You’re not trying to win teamfights, you’re trying to waste time and force attackers to reset or burn resources.
Critical Defensive Zones by Checkpoint
At the gas station, the high-ground structure (the small building overlooking the approach) is non-negotiable. Assign your best hitscan or sniper to hold this space. They farm ultimate charge while picking off isolated enemies. A secondary defensive line should establish closer to the payload, ready to rotate and support if high-ground falls. The goal is to force attackers into a two-front fight: one team pushing through the building, another fighting at payload range.
In downtown, the church area and parking lot serve as your first line. Post your tank and one DPS hero here, with supports positioned just behind. This hold doesn’t need to be permanent, it’s a stalling tool to delay payload momentum and burn time. If attackers commit ultimate resources to break it, congratulations, they’re spending win conditions early.
Secondary defensive line in downtown should be at the next natural choke (right before the final approach). Establish this before the first checkpoint falls. This isn’t a backup position, it’s a prepared position that forces attackers to fight through you twice. Having supports positioned in safe spots with healing angles intact lets you sustain through poke and punish any overextension.
At the truck stop, anchor your tank in the building directly blocking the payload. Activate defensive ultimates only as a last resort. Stack your team with clear sightlines into the approach corridor. If attackers commit a teamfight ultimate to break through, use your own ultimates to counter, the goal is to reset them or reduce their team’s HP drastically so your second rotation wins the next engagement.
Stalling Techniques and Ultimate Economy
Stalling (keeping yourself alive and forcing resets) is defense’s greatest weapon on escort maps. Heroes who excel at stalling include Tracer, Lúcio, Sombra, and D.Va, they buy time through evasion and disruption, not tankiness. A Tracer harassing the attacking supports forces defensive cooldowns and wastes attention. A Lúcio using Amp It Up on grouped allies denies burst damage and keeps chip damage minimal.
Ultimate economy requires discipline. Don’t burn Transcendence, Sound Barrier, or Earthshatter on a fight you’re losing anyway. Save them for critical moments: enemy ultimate economy runs dry, attackers have fragmented, or a checkpoint is genuinely at risk. Trading an ultimate for two enemy ultimates is a win, you’ve starved them of tools for the next fight.
Time is your resource. Every second the payload doesn’t move is a win. If you delay the gas station phase by 90 seconds, attackers hit downtown phase with less time to work downtown and the truck stop push. Over a full match, this compounds catastrophically in your favor.
A practical stalling play: don’t fight at the gas station choke. Let attackers push through, rotate to downtown, and fight there. You’ve wasted 30+ seconds and forced attackers to take map space methodically. They’re now low on time, and your second checkpoint hold is fresh. This works especially well against time-pressed attacking teams that expected an instant brawl.
High-Value Heroes for Route 66
Route 66’s sightlines and checkpoint spacing favor certain heroes over others. Knowing which picks enable your game plan is foundational.
Tanks and Initiators
Reinhardt remains the gold standard tank on Route 66. His Barrier Field turns narrow spaces into temporary strongholds, and Earthshatter into terrain combined with follow-up damage simply wins teamfights. The downside: he’s vulnerable to burst and ranged harassment, so positioning behind cover and coordinating with supports is essential. On attack, he opens space: on defense, he anchors holds.
D.Va excels in both attack and defense through mobility and playmaking. Her Boosters enable aggressive rotations and repositioning that punishes static defenses. Self-Destruct is a zoning tool that forces defenders to respect space, just avoid triggering it into a Barrier Field or wasting it on isolated targets.
Sigma is a positioning chameleon. His Kinetic Grasp denies burst damage, Accretion stuns grouped enemies, and Barrier provides mobile cover. His weakness is reliance on ultimate economy, without Gravitic Flux, he’s a large, tanky target with modest survivability.
Junker Queen works as a secondary tank alongside another tank or as a solo tank in aggressive comps. Her Carnage ability and ultimate Rampage punish grouped enemies, but she needs supports who understand positioning, missing her dive means she feeds ult to enemies.
Supports and Utility
Lucio is hands-down the best support for escort maps. His Amp It Up denies burst damage, his Sound Barrier is a clutch teamfight tool, and his Speed Boost enables both aggressive engagement and desperate regroups. He doesn’t need a partner to survive, he survives through positioning and mobility.
Ana provides utility through Sleep Dart (stuns key enemies), Anti-Heal Grenade (shuts down sustain), and Nano Boost (enables burst damage or ultimate acceleration). Her downside: she’s vulnerable to dive and requires positioning discipline. Pair her with a second support who covers close range.
Zenyatta enables ultimate economy through Discord Orb, which amplifies team damage and farm ultimate charge faster. His Transcendence ultimate saves groupfights from burst. He’s immobile, so positioning behind your team’s effective range is non-negotiable.
Brigitte provides sustain through Inspire, stun through Shield Bash, and Rally as a powerful defensive ultimate that stabilizes crumbling holds. She’s effective against brawl-heavy teams but struggles against poke and ranged harassment.
Damage Dealers and Finishers
Widowmaker and Ashe are the premium ranged DPS on Route 66 due to the abundant sightlines. Both reward positioning and mechanical skill with high elimination pressure. Widowmaker’s Infra-Sight ultimate generates incredible information and enables coordinated plays. Ashe’s Coach Gun enables repositioning and quick escapes.
Tracer is the ultimate value hero on escort maps. She harasses supports, wastes resources, and farms ultimate charge rapidly. She’s high-skill, high-reward, piloting her well is worth the effort on this map.
Genji works in coordinated comps built around his ultimate Dragonblade, but he’s risky. He needs openings and teammate follow-up. Without them, he feeds.
Sojourn offers sustained damage, positioning flexibility, and Overclock for burst windows. She’s a solid all-rounder without the mechanical ceiling of Widowmaker or Tracer.
Reaper works in brawl-heavy compositions where he dives backline and secures kills within his effective range. He’s map-dependent and team-comp-dependent, picking him into Widowmaker mirror matchups is typically a mistake.
Common Mistakes and How to Avoid Them
Even solid players make systematic errors on Route 66. Recognizing and eliminating them is the fastest path to climbing.
Mistake: Spreading Your Team Across the Map. This is the most common throwing pattern. Attackers assign one player to each choke point “to scout” or “harass,” and defenders spread thin to “cover all angles.” What actually happens? Attackers lose 5v4 teamfights repeatedly, and defenders get isolated and eliminated one by one. Fix: Stay grouped. Every fight should be your team of five against theirs. If a position looks unclearable without isolated picks, you’re fighting incorrectly.
Mistake: Burning Ultimates in Won/Lost Fights. Using Earthshatter when your team is already winning the teamfight is feeding ultimate value to enemies who now know exactly what cooldown you’re down. Conversely, sitting on ultimates while losing consecutive fights wastes their potential. Fix: Time ultimates to swing losing fights. If you’re down 3v5, don’t initiate, play around cover and wait for enemies to make mistakes. If enemies are grouped and low, then commit.
Mistake: Not Capitalizing on Checkpoint Clears. Defenders regroup after a checkpoint falls, and attackers waste valuable seconds repositioning or looting for health packs. Momentum matters immensely. If you just broke a defensive hold, push immediately while they regroup. Don’t give them time to establish a second line. Fix: After every checkpoint, execute the next push within 15-20 seconds. This denies defenders breathing room and chains momentum.
Mistake: Committing to One Engagement Too Long. Some teams fight at the gas station for two full minutes, slowly grinding each other down. Even if you’re winning, prolonged engagements bleed ultimates and allow the clock to tick. Fix: Win or reset quickly. If a teamfight isn’t clearly going your way after 20-30 seconds, call a reset, regroup, and try from a different angle.
Mistake: Not Reading Defensive Positioning. Defenders signal their strategy through where they position. If they stack high-ground, they value hitscan duels and ranged poke. If they hold grouped near payload, they’re threat-stacking and expect brawl. Attacking without countering their positioning setup usually fails. Fix: Scan for defensive positioning and adjust your approach. If opponents hold high-ground, use flanks. If they’re grouped, use AoE ultimates.
Mistake: Playing Without a Clear Win Condition. Some lineups just don’t synergize. A Widowmaker + Tracer damage composition needs support ultimates like Nano Boost or Amp It Up to accomplish anything. Without clear damage amplification or positioning enablers, you’re hoping for picks, and picks don’t guarantee teamfight wins. Fix: Draft with clear synergies: hitscan benefits from Ana healing and Discord, dive benefits from Lucio speed and peel, brawl benefits from Brigitte and Zenyatta for raw tankiness and burst denial.
Advanced Tips for Competitive Play
Climbing Route 66 at high ranks demands subtle understanding beyond basic strategy.
Ultimate Tracking and Prediction. Estimate when enemies earned ultimates based on damage dealt, kills, and assists. If their Mercy hasn’t used Resurrection in 90 seconds, she’s building toward it, expect her to hold it defensively. If your Reinhardt just ulted and their D.Va didn’t use Defense Matrix, assume they’re saving it for the next teamfight. Planning around expected ultimates lets you soft-counter through timing and positioning.
Sightline Denial Through Cover. Route 66’s openness can be weaponized or exploited. Attacking teams often position behind payload or low-cover structures to deny ranged damage. Defending teams use buildings and elevation to maximize sightline advantage. Study sightlines during team composition selection, if you’re running Widowmaker, the gas station high-ground is non-negotiable. If you’re running Genji, don’t peek long-distance into Widowmaker territory.
Sound Cue Priority and Information Gathering. Route 66’s audio design offers tons of information. A Lucio Sound Barrier sound cue tells you the defending support just used defensive ultimate, expect vulnerability. A Roadhog Hook sound cue means he’s on rotation, watch for flanking positions. High-rank teams play with sound maximized and leverage this information.
Rotation Timing and Secondary Hold Positioning. Advanced defensive teams don’t reset after checkpoints: they rotate to the next pre-established position during the countdown. When gas station point falls, your second tank should already be rotating to downtown checkpoint, and your supports should already have healing angles into the secondary line. This eliminates respawn timer delays and maintains continuous defensive pressure. This is why coordinated teams hold so effectively, they optimize every second of transition time.
Payload Abuse for Space Control. The payload is cover, not just an objective. Pushing payload into open space that normally favors defenders can reverse the matchup. For example, moving the payload forward 10 meters into downtown opens sightlines that attackers exploit better than defenders. Smart attacking teams consider payload positioning as aggressively as they consider enemy positioning.
One-Tricking vs. Flexibility. Route 66’s three-phase structure means meta shifts within a single match. The gas station might favor brawl, downtown might favor poke, and truck stop might favor positioning/zoning heroes. Flexible players who can adapt heroes between checkpoint phases climb faster than specialists who force their hero through all three. A player who switches to Sigma for truck stop after playing Reinhardt through downtown has a realistic win condition. A Reinhardt one-trick fighting at the truck stop is inherently disadvantaged.
Understanding Your Rank’s Skill Delta. Bronze and Silver Route 66 is literally teamfight wins on the payload, structure matters minimally. Gold is where basic positioning appears. Platinum is where ultimate economy begins mattering. Diamond+ is where every mistake costs the round. Adjust your playmaking to your rank. If you’re in Plat, don’t expect your team to track enemy ultimates, call them out yourself. If you’re in Diamond, expect every player to rotate smartly and hold you accountable for mechanical execution.
The approach detailed in Overwatch Techniques: Essential Tactics expands on how these individual technical skills combine into macro plays that convert winning positions into actual wins. Also, studying Overwatch Examples: Real-World Applications of professional teams showcases how Route 66 positioning translates across different skill levels. Resources like GamesRadar+ provide updated patch notes and meta shifts, so staying current with balance changes is essential, a hero that was meta in Season 11 might be completely unviable in Season 12 depending on nerfs or buffs.
Conclusion
Route 66 is a well-designed map that doesn’t require gimmicks or exploits, just discipline, game sense, and execution. The players and teams that master it share common traits: they stay grouped, they track ultimates, they position deliberately, and they adapt their hero pool to match map phases.
Attacking demands coordination and purposeful aggression. You’ll fail if you play passively and let defenders dictate engagements. Equally, you’ll fail if you’re recklessly aggressive without coordination. The sweet spot is structured aggression: clear win conditions, coordinated ultimates, and purposeful space creation.
Defending requires patience and discipline. Trading time for resources is the entire game. Forcing attackers to reset, burn ultimates, and reconsider their approach is a victory. Stalling near checkpoints and denying space incrementally compounds into match wins.
The heroes that dominate Route 66, Reinhardt, Widowmaker, Lucio, Tracer, share versatility and map utility. Specializing in a few enables mastery. Resources like Game8 offer meta tier lists and build recommendations that get updated seasonally, so checking current rankings before competitive sessions is worthwhile.
Climb Route 66 by focusing on the fundamentals: group with your team, coordinate ultimates, position smartly, and adapt your draft to map phases. The mechanical skill exists in your mechanics, but the wins come from discipline and systems thinking.